1. navigate to JBoss Console login page and login as admin
2. navigate JMS Messaging Provider
Profile > Messaging > Messaging Provider, click View
3. Click JMS Destination
4. under Queues tab, click add
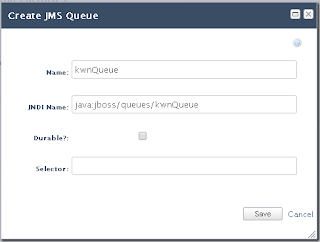
5. fill in the form, click Save
6. Review the Queue summary
Done!!
Monday, October 3, 2016
Subscribe to:
Comments (Atom)
Popular Posts
- Simple number validation in JSF
- How to install PrimeFaces Extensions in a PrimeFaces project
- How to disable Choose button in PrimeFaces fileupload component
- How to add Sequence Generator to a table in Oracle SQL Developer Data Modeler
- How to show wider year range in PrimeFaces Calendar
- Group Chatting with SparkWeb and OpenFire
- How to backup Oracle SQL Developer Data Modeler project
- How to export data model to DDL with Oracle SQL Developer Data Modeler
- How to generate javadoc with Eclipse
- How to transform Play project as Eclipse project


